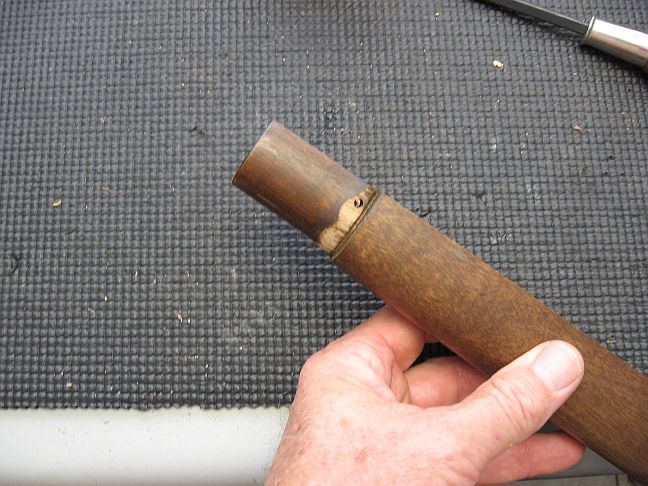
I started on my Wizard this evening as a couple of flat tires on my tractor ended occupying a big chunk of my free time today. On this firearm, the forearm is attached to the barrel via the sling swivel stud and the hole through the stock had a chipped edge. My the experience I've gained in working with the Rossi wood, I know that "Walnut" plastic wood matches and that you might as well take it down to the bare wood and start over on the stain. So I did.
In my reloading room I have a bathroom so I put the the forearm under the running water and lightly sanded it with the grain using a 180-grit sanding block. In three and a half minutes it was at the bare wood with no stain left. The dark area on the forward part of the stock is still wet.
I was too worn out to work do the same to the butt stock but will knock it out first thing in the morning. The sanding block is the Norton Premium Small Area Sanding Sponge that are sold at Lowes. I have them in a bunch of different grits, the wash out very easily, and last a long time. I want to say they are about $5 each.
Rossi Finish Removal
-
Ranch Dog

- Site Admin

- Posts: 9399
- Joined: 23 Jan 2012 07:44
- Location: Inez, TX
- Has thanked: 1838 times
- Been thanked: 2281 times
Rossi Finish Removal
You do not have the required permissions to view the files attached to this post.
Michael

-
Maximumbob54
- 250 Shots

- Posts: 333
- Joined: 17 Jun 2013 08:12
- Location: Kingsland, GA
- Has thanked: 100 times
- Been thanked: 50 times
Re: Rossi Finish Removal
I usually just brush on some KS3 Klean Strip:
http://www.wmbarr.com/product.aspx?catid=72&prodid=117
It works fast and cleans up pretty easy without having to sand anything down. Smaller stuff like revolver grips I like to just drop into a glass jar filled with acetone. Just make sure there is no plastic in the grip anywhere like the back of logo medals.
-
Ranch Dog
- Site Admin
- Posts: 9399
- Joined: 23 Jan 2012 07:44
- Location: Inez, TX
- Has thanked: 1838 times
- Been thanked: 2281 times
Re: Rossi Finish Removal
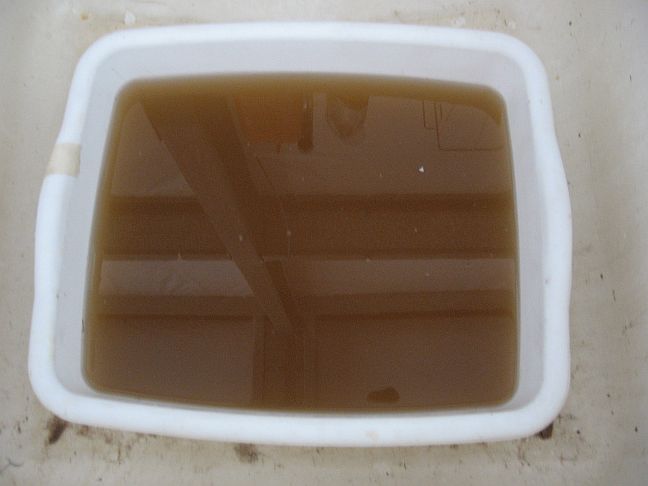
Here are some images and comments from the work I've been doing, I'm actually working on three rifles at one time. As in the opening post, I completed the same work with on the butt stock with the sanding sponge. I'm not using any pressure with the sponge, using it exactly as you would a sponge. Here is the water after 5 minutes of "washing" the stock.
Here is the stock as it dries.
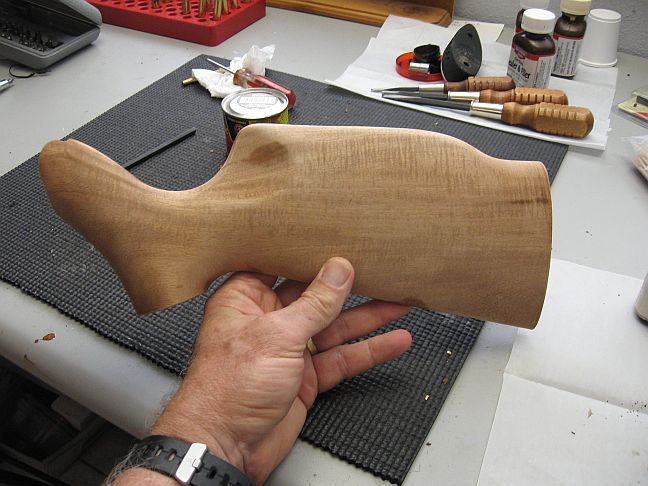
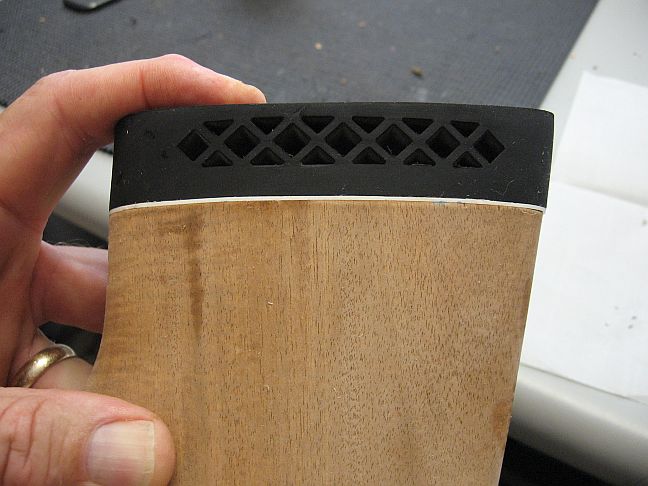
The sponge is not sanding. It is only polishing and washing. I have not removed any material from the stock. The butt spacer and recoil pad is still as fitted by Rossi. I noticed that the code on the butt stock matches the code on the space and recoil pad so these are mated before the finish is applied.
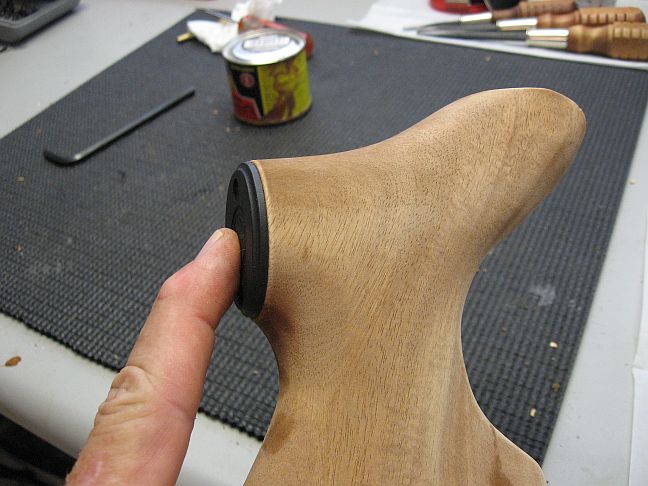
The same with the pistol grip cap. No change to the fit.
Here is the factory finish on my R92, pretty poor. They didn't even bother slopping on the stain behind the barrel band.
Last year during my nilgai hunt with my RG4570, I had to sit out in the open on the coastal plains as a heavy thunderstorm moved over the top of me. I stayed as low as I could get out in the grass and tried to keep my rifle covered with my body. The splatters that hit the stock stained it pretty bad. With nothing to do but observe that, I figured that the finish was water based and pretty thin. I decided to test that today. I dropped the above forearm in the white dish pan in the image above with clear water. It floated like the it rests just at the surface so it was covered with water. After 30 minutes, I pulled it out, rinsed it, as set it out to dry. The water was not quite as dark as the picture at the top of this post but a lot of the stain had leached out. I did not wipe, sponge, or sand the forearm stock; I just shook the water off and set it down to dry with the other stocks.
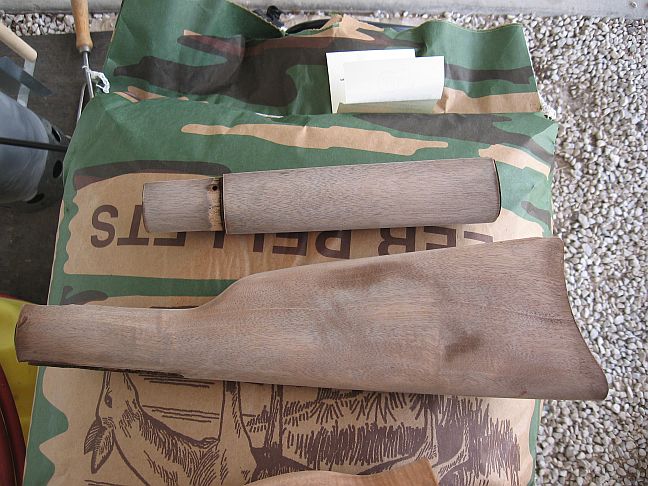
I would say the Rossi finish has left the stock. The butt stock had received the 5 minute was with the sanding sponge. Either way, it makes for a very easy and cheap removal. Just throw it in a bucket of tap water!
Overall, I've found the wood quite hard as it stands up well to working with a sanding sponge but the finish quite weak as it dissipates with water. All this is great for the DIY guy. On to the staining this afternoon.
Here is the stock as it dries.
The sponge is not sanding. It is only polishing and washing. I have not removed any material from the stock. The butt spacer and recoil pad is still as fitted by Rossi. I noticed that the code on the butt stock matches the code on the space and recoil pad so these are mated before the finish is applied.
The same with the pistol grip cap. No change to the fit.
Here is the factory finish on my R92, pretty poor. They didn't even bother slopping on the stain behind the barrel band.
Last year during my nilgai hunt with my RG4570, I had to sit out in the open on the coastal plains as a heavy thunderstorm moved over the top of me. I stayed as low as I could get out in the grass and tried to keep my rifle covered with my body. The splatters that hit the stock stained it pretty bad. With nothing to do but observe that, I figured that the finish was water based and pretty thin. I decided to test that today. I dropped the above forearm in the white dish pan in the image above with clear water. It floated like the it rests just at the surface so it was covered with water. After 30 minutes, I pulled it out, rinsed it, as set it out to dry. The water was not quite as dark as the picture at the top of this post but a lot of the stain had leached out. I did not wipe, sponge, or sand the forearm stock; I just shook the water off and set it down to dry with the other stocks.
I would say the Rossi finish has left the stock. The butt stock had received the 5 minute was with the sanding sponge. Either way, it makes for a very easy and cheap removal. Just throw it in a bucket of tap water!
Overall, I've found the wood quite hard as it stands up well to working with a sanding sponge but the finish quite weak as it dissipates with water. All this is great for the DIY guy. On to the staining this afternoon.
Michael
-
Pb2au

- Posts: 71
- Joined: 25 Dec 2012 10:10
- Location: Southwest Ohio
- Has thanked: 9 times
- Been thanked: 10 times
Re: Rossi Finish Removal
Gosh darn it.
I have not been too excited with the finish on my M92 since I picked it up. Your thread I think just cinched it, the M92 is getting re-finished.
Do you or any other team member here have a preferred finish? I have never been one for a glossy finish. My preference has always run towards satin/oil finishes.
I will be watching this thread with great anticipation........
-
akuser47

- Founding Member

- Posts: 5070
- Joined: 12 Feb 2012 11:43
- Location: ohio
- Has thanked: 1266 times
- Been thanked: 482 times
Re: Rossi Finish Removal
Good post thanks RD

Live Free,Ride Free, Or Die Fighting, For The Right, To do So!
-
Ranch Dog
- Site Admin
- Posts: 9399
- Joined: 23 Jan 2012 07:44
- Location: Inez, TX
- Has thanked: 1838 times
- Been thanked: 2281 times
Re: Rossi Finish Removal
Tru-Oil is a hand rubbed oil finish. The final product is up to you. You can leave a final coat alone for a gloss finish, use B&C Sheen & Conditioner for a satin finish, or a light buff with 0000 steel wool for a flat finish. Tru-Oil is also a "living" finish that you can touch up or adjust at any time. I will have some pictures up shortly of the three stocks with the B&C Walnut Stain.Pb2au wrote:Do you or any other team member here have a preferred finish? I have never been one for a glossy finish. My preference has always run towards satin/oil finishes.
You're Welcome!akuser47 wrote:Good post thanks RD
Michael
-
Ranch Dog
- Site Admin
- Posts: 9399
- Joined: 23 Jan 2012 07:44
- Location: Inez, TX
- Has thanked: 1838 times
- Been thanked: 2281 times
Re: Rossi Finish Removal
Six of my ten Rossi rifles have been finished with the Tru-Oil finish. Three are a work in progress with two yet to work on. Looking at the finished rifles with the knowledge of how easy it is to remove the Rossi finish, there is no doubt the remaining rifles are going down to the bare wood as outlined above.
There is no doubt they are going to get the wash with the 180-grit sanding sponge as it makes such short work of it. With the solid "jungle wood" the sponge is simply polishing the exterior of the wood despite its grit. I have not been putting any elbow grease in the wash, just the effort I would expending washing a dinner plate.
Now, on the the stain using B&C Walnut Stain. The instructions call of it to be applied cut, 50/50, with tap water. I tried that on one of the previous stocks and it was too light. This is the stain applied to the bare jungle wood with a little foam brush. I did rub down the stocks with a tack cloth prior to applying the stain. I will use a tack cloth from here on out prior to applying any B&C product.
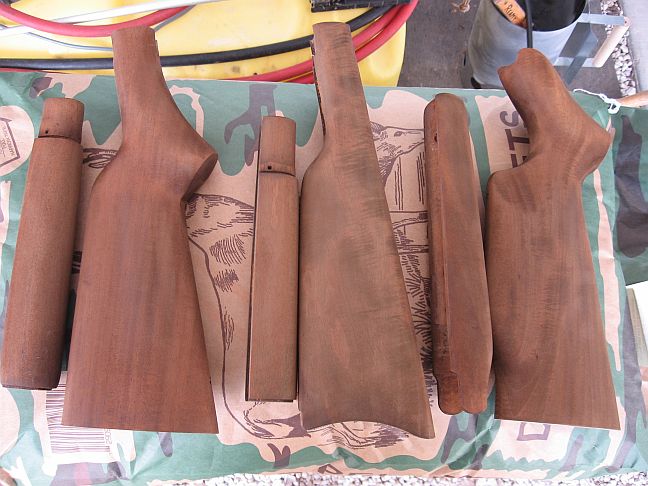
I normally do everything in my conditioned reloading room but after the stain was about an hour old, I moved everything outside to rest on some deer feed bags as it is 103° and 51% humidity. That will set it up real quick and allow me to apply the B&C Stock Filler and Sealer tonight. The Rio Grande stock on the left is the plainest but the TO will enhance the straight grain real well. The R92 is in the middle and this is going to be one good look scout rifle with it's tiger striped butt stock. The Wizard is probably the best grained of the lot it will end up being a very classic walnut finish.
Still only handling the individual stock pieces for about 3 to 5 minutes at the most. I'm using the little Dixie cups to hold the liquids and the little foam brushes for the stain and sealer so I can toss them. No time spent on clean up.
There is no doubt they are going to get the wash with the 180-grit sanding sponge as it makes such short work of it. With the solid "jungle wood" the sponge is simply polishing the exterior of the wood despite its grit. I have not been putting any elbow grease in the wash, just the effort I would expending washing a dinner plate.
Now, on the the stain using B&C Walnut Stain. The instructions call of it to be applied cut, 50/50, with tap water. I tried that on one of the previous stocks and it was too light. This is the stain applied to the bare jungle wood with a little foam brush. I did rub down the stocks with a tack cloth prior to applying the stain. I will use a tack cloth from here on out prior to applying any B&C product.
I normally do everything in my conditioned reloading room but after the stain was about an hour old, I moved everything outside to rest on some deer feed bags as it is 103° and 51% humidity. That will set it up real quick and allow me to apply the B&C Stock Filler and Sealer tonight. The Rio Grande stock on the left is the plainest but the TO will enhance the straight grain real well. The R92 is in the middle and this is going to be one good look scout rifle with it's tiger striped butt stock. The Wizard is probably the best grained of the lot it will end up being a very classic walnut finish.
Still only handling the individual stock pieces for about 3 to 5 minutes at the most. I'm using the little Dixie cups to hold the liquids and the little foam brushes for the stain and sealer so I can toss them. No time spent on clean up.
Michael
-
Maximumbob54
- 250 Shots
- Posts: 333
- Joined: 17 Jun 2013 08:12
- Location: Kingsland, GA
- Has thanked: 100 times
- Been thanked: 50 times
Re: Rossi Finish Removal
Oh wow. I knew the finish used was thin but I didn't know it would wash off with water. Now it's time to break out the Tru Oil for sure.
-
akuser47
- Founding Member
- Posts: 5070
- Joined: 12 Feb 2012 11:43
- Location: ohio
- Has thanked: 1266 times
- Been thanked: 482 times
Re: Rossi Finish Removal
Those sets are gonna look great when you get them finished up.
Live Free,Ride Free, Or Die Fighting, For The Right, To do So!