Okay Gunslingers, or at least those considering the Gunslinger Spring kit, I've decided to update the information a bit.
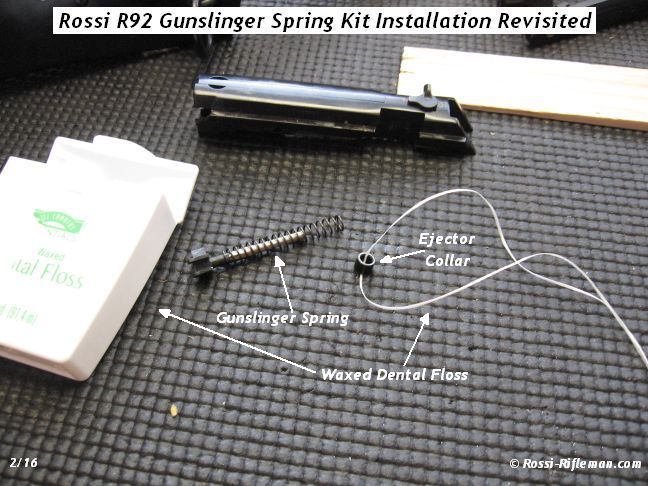
The Gunslinger use a very long ejector spring that is tough to install. I started using dental floss to compress the component stack on the ejector for installation. I've changed it a bit to avoid any floss being left behind. It probably does not matter but I want a clean installation. So, here is how I do it combining my idea and the traditional method. I remain completely satisfied with the Gunslinger Spring Kit. Some have commented on the light trigger pull but I love it. All I do is hunt and it has not been an issue for me. It is as good a trigger as that on my Savage Scout rifles.
Here we go...
Gunslinger Spring Kit Installation Revisited
- Ranch Dog
- Site Admin
- Posts: 9398
- Joined: 23 Jan 2012 07:44
- Location: Inez, TX
- Has thanked: 1838 times
- Been thanked: 2281 times
- GasGuzzler
- Moderator
- Posts: 2751
- Joined: 02 Nov 2015 19:54
- Location: Cooke County, TX
- Has thanked: 310 times
- Been thanked: 451 times
Gunslinger Spring Kit Installation Revisited
Dang, I did it without the floss. I said bad words.
FYI text in pic 11/16 is missing a word or I simply can't see on my fowng (thanks for allowing TapaTalk).
Shame on me I used a live round...or maybe just a new piece of Starline empty brass.
Pic 13/16 is super helpful to those trying for the first time.
FYI text in pic 11/16 is missing a word or I simply can't see on my fowng (thanks for allowing TapaTalk).
Shame on me I used a live round...or maybe just a new piece of Starline empty brass.
Pic 13/16 is super helpful to those trying for the first time.
__________________________________________________________________________________________
I've always been crazy but it's kept me from going insane.
- Ranch Dog
- Site Admin
- Posts: 9398
- Joined: 23 Jan 2012 07:44
- Location: Inez, TX
- Has thanked: 1838 times
- Been thanked: 2281 times